How to Upload Local Files On Your Computer to GitHub
First time using GitHub? Learn how to upload local files from your computer to GitHub.
GitHub is a platform that uses the software Git to allow developers to create, store, manage, and share their code with others. When I was first using GitHub and Git in general, I was confused on how it worked and how to upload local files on my computer to a repository on GitHub. This article will hopefully clear any confusion and will allow you to showcase your projects to your friends and future employers.
Creating a Repository
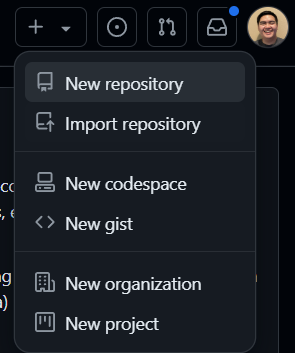
A repository on GitHub is essentially a “project folder” that stores live files, tracks changes and modification history, and allows developers to collaborate on suggested ideas and code fixes. To create a repository on GitHub, create an account on GitHub if you have not. Once done, click on the green button that says New or click the plus (+) button at the top right of the webpage and select New repository.
Enter a repository name (required) and a description (optional), select if the repository will be public or private, and initialize the repository with a README.md file and a license (optional). A README.md file gives your repository a readable description underneath the files in your repository, and a license gives certain permissions to individuals and enterprises depending on the license you choose. Once completed, select Create repository at the bottom of the webpage.
It is best practice to name your repository using snake case (e.g., school_python_project) or kebab case (e.g., school-python-project). I personally use kebeb case, but regardless of which case you use, the goal is to use a short but memorable name.
Uploading Files to GitHub Directly
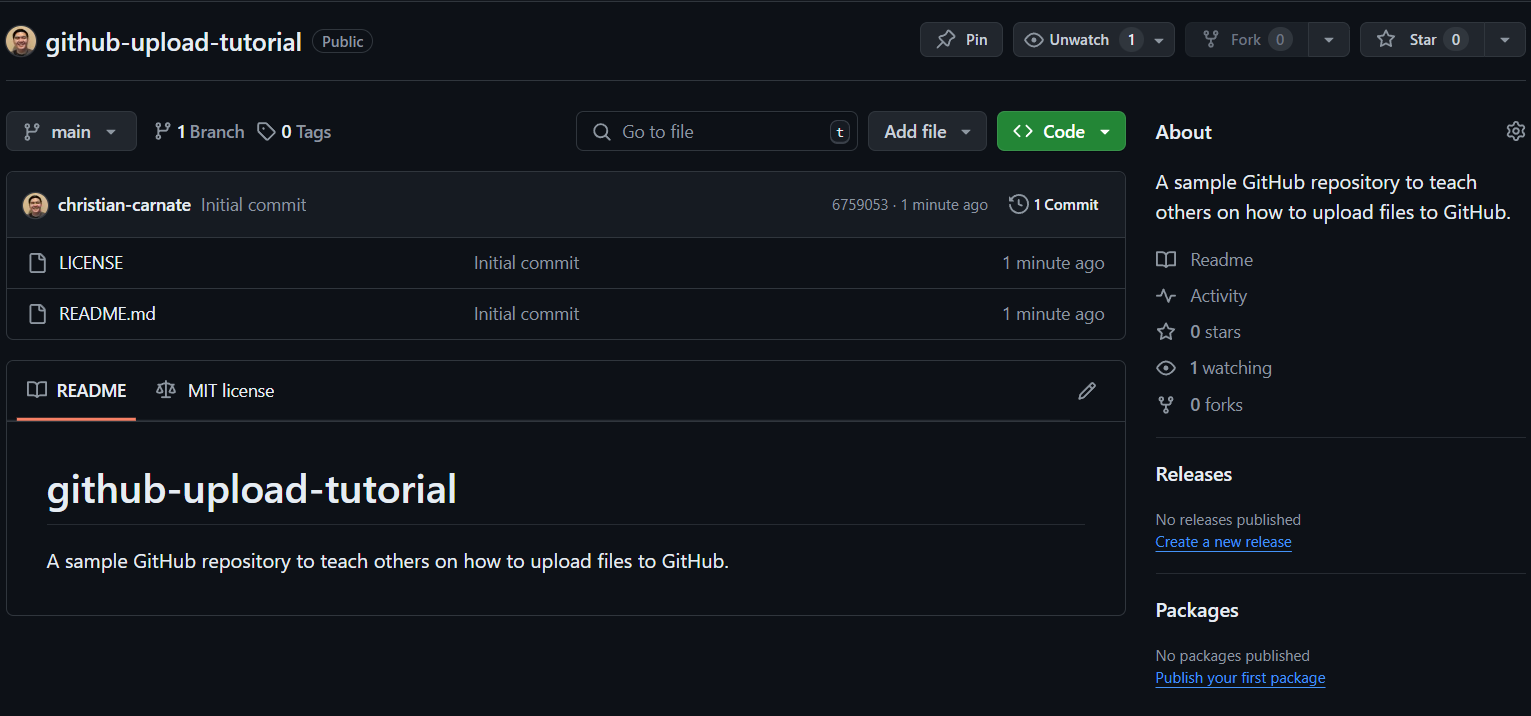
Once you have created your repository, it should look like this. Notice the README.md file has added a readable description underneath the files in the repository, and you can also read your license if you added one.
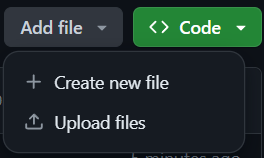
From here, you can directly upload files by clicking Add file and selecting Upload files next to the green Code button.
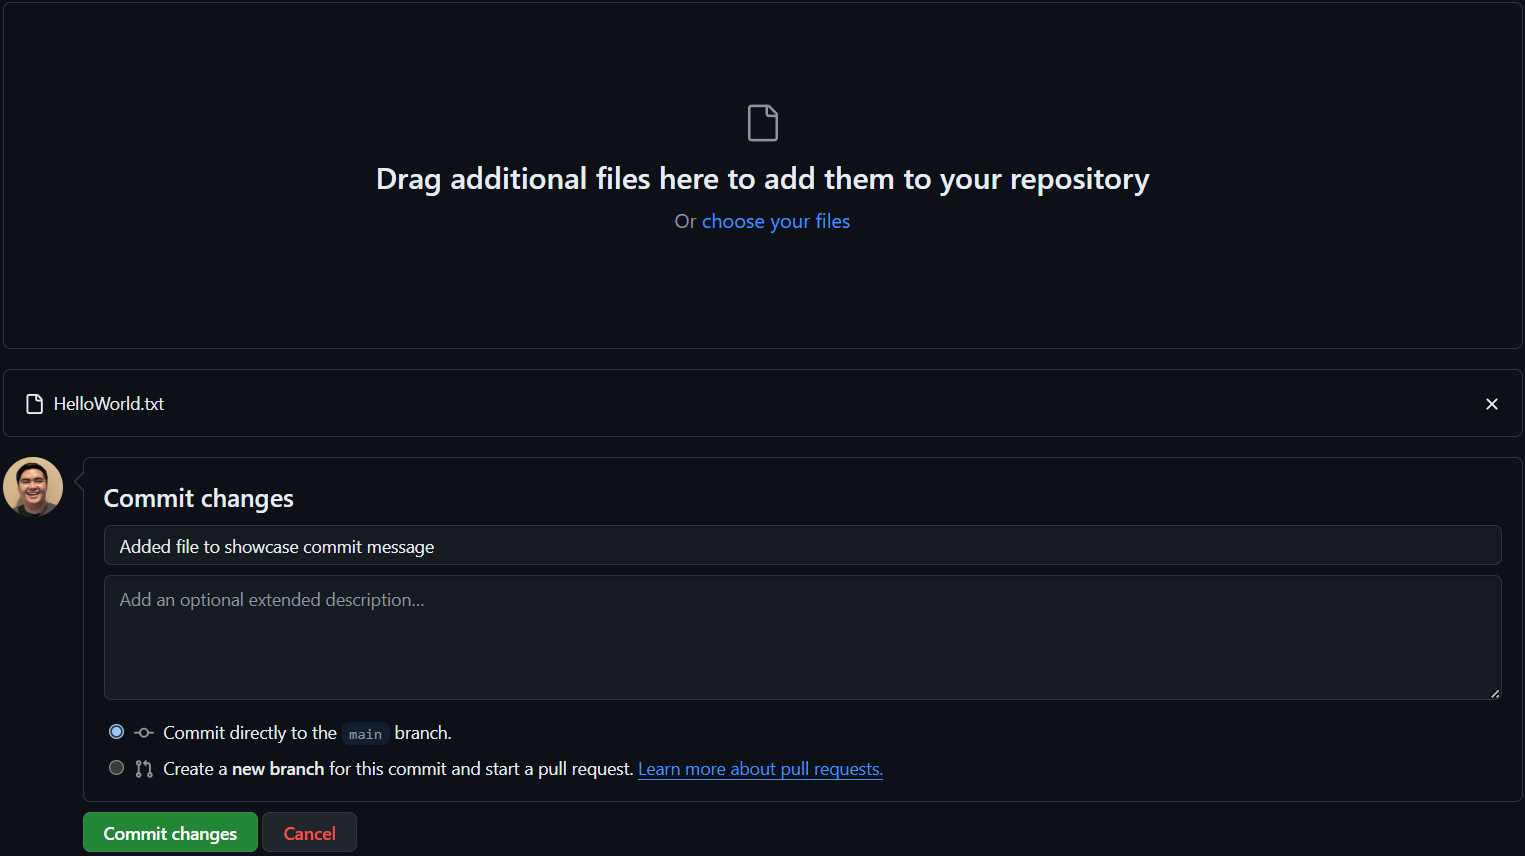
Drag your file to the file input box or select files from your computer to upload. Once completed, you can either leave or change the default commit message of “Add files via upload.” It is recommended to add a brief commit message that describes what your new commit is. Regardless, click Commit changes to finally upload your file(s) to your repository.
The file(s) you have uploaded should now appear in your repository.
Uploading Files and Folders to GitHub via Command Prompt or Terminal
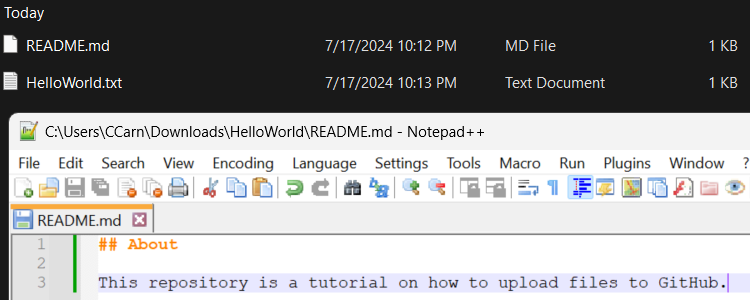
Although directly uploading small files to GitHub is easy, uploading larger files, folders, and entire projects is easier through a command-line interface (CLI). To upload a folder via a CLI, you will need to install Git first. Once done, if you want to have a readable description underneath your files, you have to create and include a README.md file within your folder. On Windows, you can create and rename a file to have a .md (markdown) extension then use Notepad++ to edit the file and the Markdown Guide as a guide on how to use Markdown. On Linux, you can use the touch and nano commands to create and edit the .md file then use the Markdown Guide for assistance using Markdown.
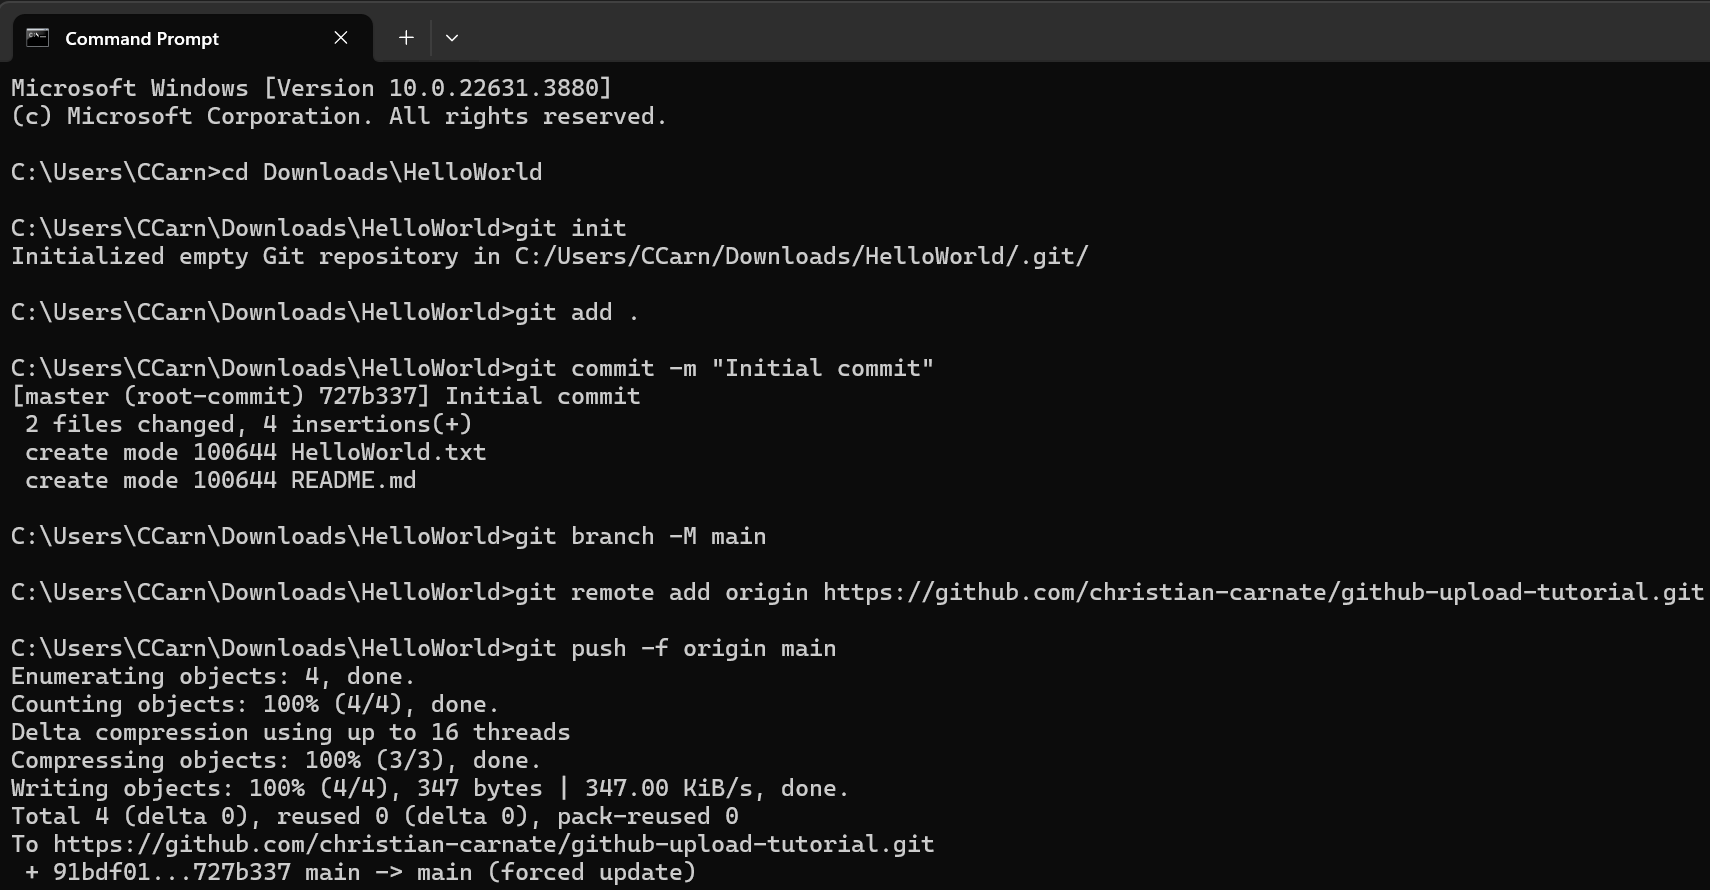
Once completed, open Command Prompt (on Windows) or terminal (on Linux). Enter the following commands in your terminal.
1
2
3
4
5
6
7
cd <path-to-directory>
git init
git add .
git commit -m "<commit-message>"
git branch -M main
git remote add origin <url-to-GitHub-repository>
git push -f origin main
- The
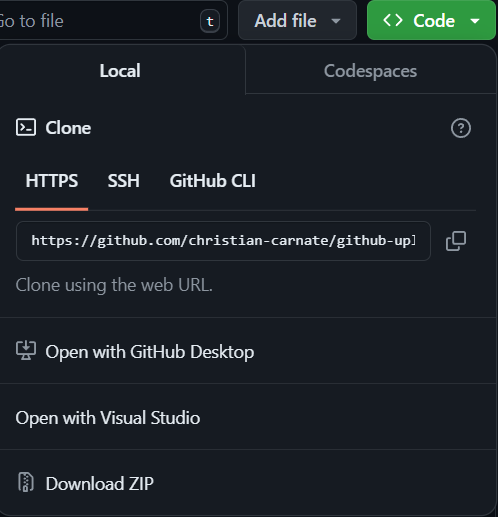
cdcommand changes the directory you are working in. git initinitializes and organizes the folder so it can be used a repository.git add .tells Git to add the files in the folder to the repository.git commit -m "<commit-message>"creates a commit with a custom commit message (make sure to change commit-message to whatever you wish and to enclose it in quotation marks).git branch -M mainsets the main branch, which is already the default branch for your repository.git remote add origin <url-to-GitHub-repository>tells Git which repository to upload the files to (grab the URL that ends in .git by clicking the green Code button on your repository’s webpage and copying the HTTPS URL).git push -f origin mainforce pushes your commit to GitHub.
If you want to push a local repository that is already initialized and has a remote origin set, use the command git remote remove origin to remove the remote origin then use git remote add origin <url-to-GitHub-repository> to change which repository you want to upload to.
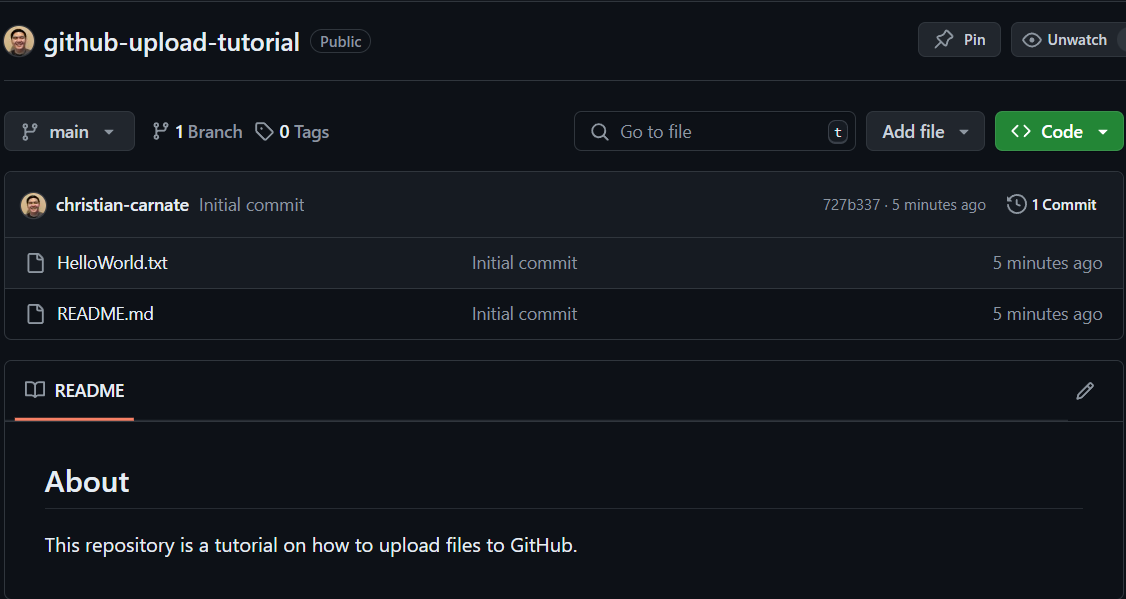
Once you have completed all steps above, your files should have been uploaded to GitHub. If you have a README.md file, then it should display your markdown text underneath your files.
Keep in mind that any files that existed in the repository prior to the pushing of the commit will be replaced with the files included in the commit.
Final Thoughts
Congratulations, you have learned how to upload files and folders to your new GitHub repository. You can now share your hard work with friends, classmates, and future employers.


